3D Artist
Leigh Smith
Hi! I'm a passionate 3D artist that focuses on
environment and level design!
Capstone Project
Solarpunk Environment
Arcane Diorama

PKMN Trainer Room
Contact me
More Information
I am proficient in Maya, Unity, Substance Painter and Photoshop and have some experience using Blender, Unreal Engine and zBrush.Contact me using my email down below or via LinkedIn through the icon at the end of the page.
Art done by Leigh Smith

About Me !
Hi! My name is Leigh, a graduate from RMIT's Bachelor of design (Games). I'm a 3D artist with a particular interest in environment and level design. I enjoy making environments with strong distinctive aesthetics in hopes it'll leave a stronger lasting impact on the viewer.
I've had a strong passion for art and games since I was young. Pokemon, Animal Crossing and Minecraft, just to name a few, had me enthralled in gaming at a young age. I then came to fall in love with 3D through games like ABZU, INSIDE and Little Nightmares for how they constructed such visually engaging story telling environments.
When I'm not creating 3D art, im often improving my skills in 2D art to keep those creative thoughts flowing. Although, I think the real brains behind the scenes would be my cat Mittens, and dog, Levi, pictured down below.


Take a look at my work pictured on the previous page!Contact me via my details for any inquires.

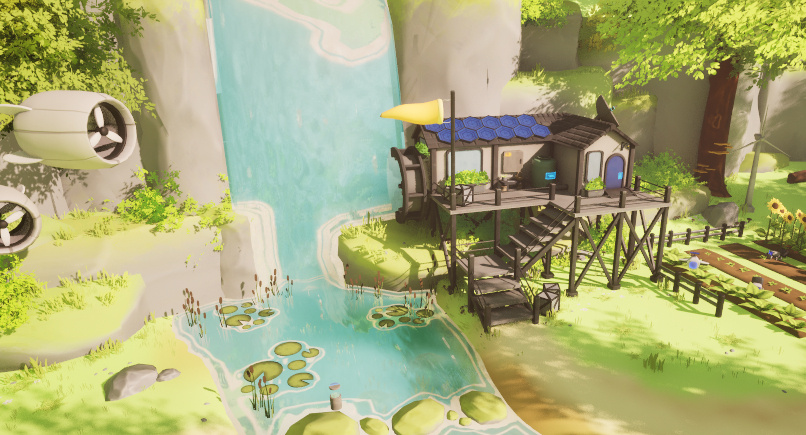
Solarpunk Environment
This solarpunk inspired environment is set in a forest where a research lab resides, sampling the area, and living in harmony with eco-friendly robots.All models created and textured by myself using Maya and Substance Painter, environment constructed using Unreal Engine.
Concept Art


Executing rough quick concept sketches to get ideas onto the page which can then be expanded upon later on.Trying to create a rough aesthetic between concepts for cohesion and readability.Then moving to digital drawing for quick colours and exploration of other concepts before the final key artworks.


key artworks


3D Development
Examples of important models in the scene, showcasing some wireframes and UV maps.In this stage I also explored different lighting, simple colours as well as paint overs in order to establish the mood before moving onto model texturing.


After creating some important key models for the scene, I like to go into the environment and block in the layout to establish lighting. Then doing a paintover to better visualise the finished environment
Turntables
Lighting & paintovers


Exploring what angle the light should come from. Should it be warm light, cold light etc. How does it interact with potential colours in the environment


Paintovers to better understand the final product. Are things missing, if so what? Does the layout of the environemt feel appealing? etc.
Finished Product


walkthrough video
All assets created by Leigh Smith


Capstone Project
"Time to go Home" is a university project I made along side Jimmy Lin, Marvie Marin and Jay Brendan Del Rosario.I took on the role of Lead 3D artist and Tech artist, creating all the 3D models and their textures, as well as the shaders and post processing in the game. I worked alongside our Art Director for environment design, and when needed I would also work on 2D assets, such as the logo and some UI elements.Game was created with Unity, models made using Maya, Substance painter and Photoshop, shaders created with Unity's ShaderGraph.
Content
- Environment Development
- 3D Models
- Shaders
- Fished Product
Trailer
Environment Development
Base classroom
Straight away I got into creating basic 3D models and using primitive shapes to begin blocking out the classroom scene, working alongside the Art Director to explore colours and layout.Using Maya, I experimented with layouts and the size of the room before constructing it in Unity to test lighting.


"scribble room"
With a basic enough, bare bones, construction of our main classroom scene that we could use for playtesting, we moved on to what we called the "scribble room". Our first 'dreamscape' transtition.


For the first new environment, we wanted it to feel familiar yet dreamy and different. Iterated on how we wanted to deliver it. Gradual decrease in saturation to ease player into the mood. Exploring different post processing affects to achieve our aesthetic. Good start for playtesting, but still in early development.
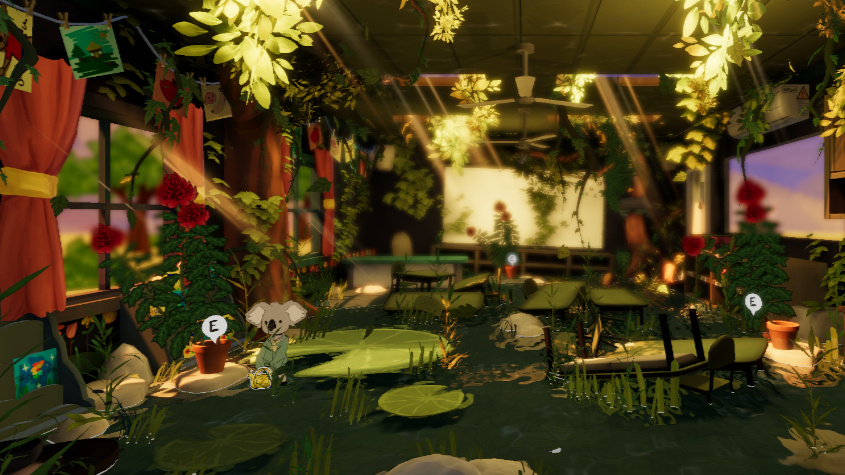
"overgrown room"
Due to time constraints, we had to move on to other areas and circle back when it was time to polish.I created this paintover for our next room. It helped serve as a reference for aesthetics, colour, and lighting.


Early water shader, lighting and foiliage development. Wanted this room to stand out and have strong visual engagement. Created a godray particle to push the lighting aesthetic.
scrapped room


Again, had to move on to the next room, so I created another paintover for the room we had planned next, then constructed it in unity.This room design was actually scrapped as we didnt feel super strong about it and the aesthetic we wanted to have to lead into the ending of the game.
Colour Palette
Struggling with the aesthetic of our last room, I circled back to our base rooms colours. Feedback suggested the room felt busy to look at. To combat this, I focused on the values so we could emphasise what we wanted to stand out.This aided in making the room feel more cohesive and readable. It was a colour palette that worked across all the rooms we had.


Examples of the new colour palette across multiple rooms
Dollhouse Room
At last we came to the last room again. We decided to go for a doll house feel, where the objects in the previous interaction would be placed in the scene. Our Art Director privded some guildines for the room, by drawing over an image. Assets would be shiny to give a plastic feel, and also all very similar colours, like often seen in doll house sets.


Finishing Touches
Polishing the environments consisted of baking the lighting, extra assets for detail, post processing, particle effects etc.Things that pull the rooms together to make them feel more lively and visually engaging.


See the final environment photos here
3D Models
Included down below are some wireframes, textures, UV maps and raw images of various models to highlight technical aspects of the assets created.


Screen for the TV had its own seperate UV map as it had a TV static shader which utilised the UV's.


Here are our filler objects for the classrooms in order to give them life. Shown down below are the textures I created to add personalisation to certain assets that indirectly gave the room and other students personality. We really wanted to pay attention to the detail when making the assets.


Turntables
Plants & textures
For the plants. The UV's had to be placed specifically from the bottom up as these were being used by the growth shader from the bottom upwards.


Some textures used to construct the plant assets.
This is the alpha map and textures used to create the leaves. Also shown is the albedo map and the normal map.The textures were made using Substance Painter, and there was a high poly sculpt made using zBrush.


Shaders
I created a couple simple shaders for this project. We briefly explored an outline shader, a boil shader for a scribble effect, TV static, and glimmer shader for our interactable objects.By far I am most proud of the water shader, and growth shader created for our overgrown room.


Finished Product
"Play as Kipp as he wastes away the hours after school, waiting to go home… fill up the time, drawing, sticking and wandering around in Kipp’s wondrous imagination! Take your time to reminisce and reflect through the innocent eyes of a child."We wanted to create an experience of what it's like when you're just a child who longs to go home. For players with similar memories to feel seen, and for people to walk away feeling a bit more care for the little voices around us.
Menu and end credits


Base classroom scenes - day/evening/night


Scribble Room


Overgrown Room


Dollhouse Room


All the assets I created were made using Maya, Substance Painter, Zbrush and Photoshop, and the environments were constructed in Unity.

Arcane Diorama
This diorama was created in my 2nd year of University. We were required to make assets in the style of the series "Arcane" and then using own assets, plus assets made by our peers, we would construct a diorama from either the Piltover or Zaun aesthetic.Diorama was constructed with Unity, models made using Maya and Substance painter.Inspect diorama on sketchfab here.
Concepting
Began with quick sketches of the type of scene i wanted to create, and potential assets i could make for that scene.


3D Models
These were some of the first proper 3D models I attempted at modelling and texturing. Although there are imperfections, and the UVs may not be optimised. It highlights my growth when compared to other projects


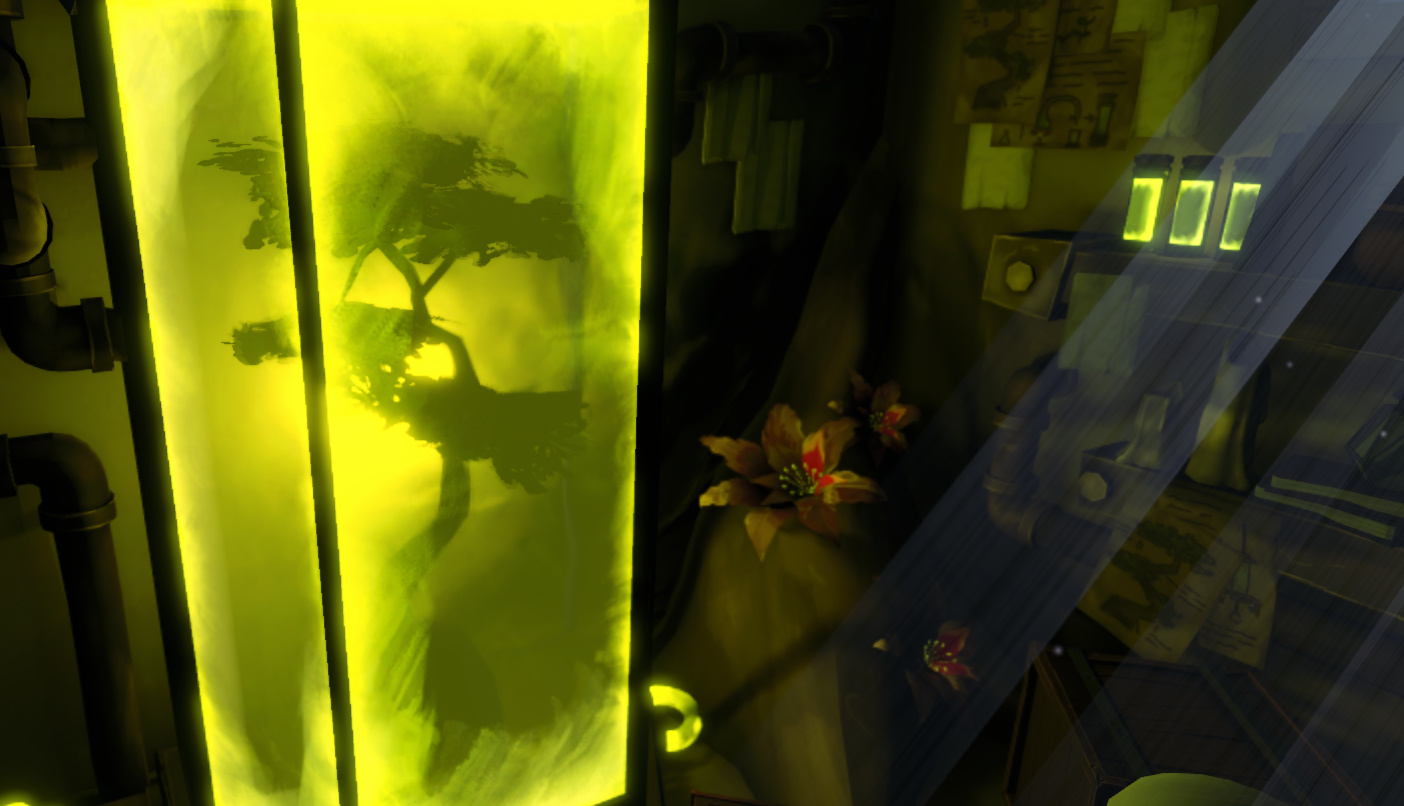
We were required to make 5 assets. 1 hero asset, and 4 standard assets that other peers could use for their own projects. I creates Zaun inspired assets. a Hero Lab Tank, then stand candle, Terrarium, poison tube and research papers.
Turntables
Models Textured


Final Diorama


Other models created by me in this scene /Diorama base/Pipes/Shelf/Tree trunk/Pots

Pokemon Trainer Room
This diorama was created in my 2nd year of University. We were required to make a room that was made up of no more than 12 assets.I went for a scene that simulates a Pokemon trainers room from the earlier games. The empty, loneley feeling is supposed to make the viewer reminisce in childhood memories from when they played the games.Models and diorama set up made using Maya, textured in Substance painter and rendered in Marmoset Toolbag.
Collecting References
Since I'm referencing Pokemon, I gathered references of pokemon rooms from the games, as well as images of the style and lighting that i wanted my scene to have.Images/artwork not done by me.


Concepting
For concepting, I began with rough sketches of what the layout of the room could be like. Once established, the key concept art was created so I could references it when constructing the room.


Key concept art

After deciding the items I want in the scene, I created concept art of each object so I can streamline the modelling process by already knowing how the assets should look. Drawing them at various angles as well so modelling them becomes easier.


3D Models & Rendering
I went for higher poly models as i wanted them to look very smooth when the light would shine through the window of the room. I wanted the models to feel more 'real' but still have a simple look about them that can make reference to the pokemon games, which are quite flat coloured in design.


Turntables
Final Render

Diorama modelled, textured and lighted by Leigh Smith